12 Days of Glittering Manis: Holiday Nail Inspiration
A Sparkling Guide to Elevate Your Holiday Nails

As the holiday season approaches, it's time to get creative with your nail art and try out some new and exciting designs. With the help of our 12-day guide, you'll be able to create stunning and unique nail looks that will make you stand out from the crowd. Whether you're a seasoned nail artist or a beginner, we've got you covered with a range of inspiring ideas and tips to help you achieve a dazzling holiday manicure.
Day 1: Glittering Snowflakes

Get into the holiday spirit with a delicate snowflake design that's perfect for the winter season. Use a small brush to paint a intricate snowflake pattern on a white or pale blue background. Add some glitter on top to give it a sparkly effect. You can also add some red or green accents to give it a festive touch.
Day 2: Winter Wonderland

Create a winter wonderland-inspired nail art design by painting a snowy landscape on your nails. Use a mixture of white and blue shades to create a gradient effect that resembles a winter sky. Add some snowflakes and trees to complete the design. You can also add some glitter on top to give it a sparkly effect.
Day 3: Holly Berry Red
Get into the holiday spirit with a bold and vibrant red nail polish color. Use a rich, berry-inspired shade to create a beautiful and eye-catching nail art design. You can add some white or silver accents to give it a festive touch. This look is perfect for a holiday party or a special occasion.
Day 4: Festive Glitter

Add some sparkle to your holiday nails with a festive glitter design. Use a mixture of red, green, and gold glitter to create a unique and eye-catching nail art design. You can add some glitter on top of a clear polish or use a glitter polish to create a sparkly effect.
Day 5: Snow Globe Scene

Create a whimsical snow globe-inspired nail art design by painting a miniature scene on your nails. Use a mixture of white and blue shades to create a gradient effect that resembles a snow globe. Add some tiny snowflakes and trees to complete the design. You can also add some glitter on top to give it a sparkly effect.
Day 6: Christmas Tree

Get into the holiday spirit with a classic Christmas tree design. Use a green polish to create the tree shape and add some red or gold accents to give it a festive touch. You can also add some glitter on top to give it a sparkly effect.
Day 7: Reindeer Games

Create a fun and playful reindeer-inspired nail art design by painting a reindeer face on your nails. Use a brown or black polish to create the reindeer's face and add some red or green accents to give it a festive touch. You can also add some glitter on top to give it a sparkly effect.
Day 8: Gingerbread Man

Get into the holiday spirit with a classic gingerbread man design. Use a brown or beige polish to create the gingerbread man shape and add some red or green accents to give it a festive touch. You can also add some glitter on top to give it a sparkly effect.
Day 9: Snowflake Garland

Create a beautiful snowflake garland-inspired nail art design by painting a series of snowflakes on your nails. Use a white or pale blue polish to create the snowflakes and add some glitter on top to give it a sparkly effect. You can also add some red or green accents to give it a festive touch.
Day 10: Peppermint Candy
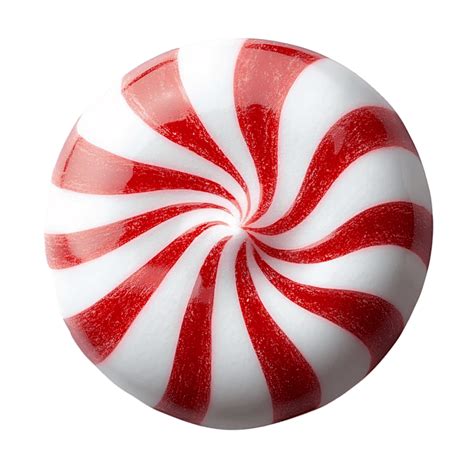
Get into the holiday spirit with a sweet and festive peppermint candy-inspired nail art design. Use a pink or red polish to create the peppermint candy shape and add some white or silver accents to give it a sparkly effect. You can also add some glitter on top to give it a festive touch.
Day 11: Christmas Ornament

Create a beautiful and eye-catching Christmas ornament-inspired nail art design by painting a Christmas ornament on your nails. Use a mixture of red, green, and gold to create a unique and festive design. You can add some glitter on top to give it a sparkly effect.
Day 12: Glittering Gradient

End the holiday nail inspiration series with a stunning glittering gradient design. Use a mixture of red, green, and gold glitter to create a unique and eye-catching nail art design. You can add some glitter on top of a clear polish or use a glitter polish to create a sparkly effect.
Tips and Tricks

Here are some tips and tricks to help you achieve a dazzling holiday manicure:
- Use a base coat to protect your nails and prevent staining.
- Choose a nail polish that suits your skin tone and personal style.
- Experiment with different nail art designs and techniques to find what works best for you.
- Use a top coat to seal in your design and add shine.
- Practice makes perfect, so don't be discouraged if it takes a few tries to get the hang of it.
Final Thoughts

We hope you've enjoyed our 12-day guide to holiday nail inspiration. With these stunning and unique nail art designs, you'll be able to create a dazzling holiday manicure that will make you stand out from the crowd. Remember to have fun and experiment with different designs and techniques to find what works best for you. Happy holidays!
FAQs
12 Days of Glittering Manis: Holiday Nail Inspiration FAQ
Q: What is the best way to incorporate glitter into my holiday nail look?
A: To add a touch of festive sparkle to your mani, try layering a clear top coat over a glitter polish or use a glitter nail stamp for a more subtle effect. You can also mix glitter into a clear polish for a DIY effect. Experiment with different types of glitters, such as holographic or fine glitters, to achieve the desired look. For a more dramatic effect, consider using a glitter nail polish as the base color.
Q: How do I prevent glitter from getting everywhere when applying nail polish?
A: To minimize mess, use a base coat and let it dry before applying glitter polish. Apply a thin layer of glitter polish and seal with a top coat to prevent excess glitter from flaking off. Clean up any excess glitter with a lint-free wipe or cotton swab.
Q: What are some popular holiday nail art designs?
A: Some popular holiday nail art designs include snowflakes, reindeer, and Christmas trees. You can also try a festive red and green stripe or dot design. For a more minimalist look, try a simple glitter accent nail or a snowflake pattern in a clear polish.
Q: How do I choose the right glitter polish for my skin tone?
A: Consider your skin tone when selecting a glitter polish. Cool-toned individuals look great with blue or purple-based glitters, while warm-toned individuals suit golden or yellow-based glitters. If you're unsure, try a neutral glitter polish like a clear or silver glitter.
Q: Can I use glitter nail polish on my natural nails?
A: Yes, you can use glitter polish on your natural nails. However, be aware that glitter polish can be more difficult to remove than regular polish. To prevent damage, use a base coat and top coat, and avoid using glitter polish on nails with existing damage or weak spots.
Q: What are some tips for achieving a long-lasting glitter manicure?
A: To extend the life of your glitter manicure, use a good quality base coat and top coat, and avoid using your nails as tools. Wash dishes and do household chores with gloves to prevent damage. Touch up your manicure as needed to maintain the glitter effect.
Q: Can I get a glitter manicure at home or do I need to go to a salon?
A: You can achieve a glitter manicure at home with the right tools and polish. Invest in a good quality nail polish and nail care tools, and practice your technique to achieve a salon-quality finish. However, if you're short on time or want a more complex design, consider visiting a professional nail technician.
Q: What are some common glitter polish-related mistakes to avoid?
A: Common mistakes to avoid when working with glitter polish include applying too much polish at once, which can lead to a mess and uneven application. Also, be careful not to over-glaze, as this can cause the glitter to clump and the polish to become uneven. Finally, avoid using glitter polish on nails with existing damage or weak spots.
Q: Can I use glitter polish on my toes?
A: Yes, you can use glitter polish on your toes. However, be aware that glitter polish can be more difficult to remove from toes than from fingers. Use a good quality base coat and top coat, and consider using a toe nail polish remover to make the process easier.
Q: How do I store my glitter polish to keep it fresh?
A: To keep your glitter polish fresh, store it in a cool, dry place away from direct sunlight. Avoid storing glitter polish near heat sources or in humid environments. Consider storing glitter polish in a separate container to prevent it from getting damaged or mixed with other polishes.